Chikka Configuration Instructions for Text Messaging
Just follow the simple procedure below:
- Run the Chikka SMS client. The lastest version is here.
- Left-click the Chikka icon on the system tray on the lower right corner of your desktop/screen.

-
From the pop-up menu that appears, select Preferences.
-
The Preferences window will open. Make sure the the option Use HTTP always is NOT checked. Click the Ok button to close the Preferences window.
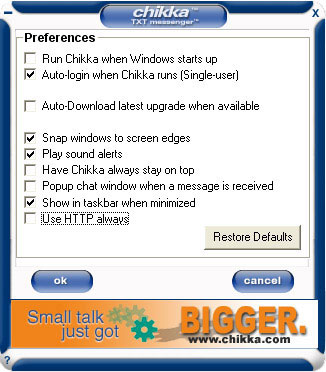
-
Left-click again on the Chikka system tray icon, then select Connection Options.
-
The Server Configuration window will open. Make your settings as follows:
-
Server IP: ctp-a.chikka.com Server Port: 443
-
Clear Auto Configure Connection
-
Check Use Proxy Server
-
Proxy Host: proxy.admu.edu.ph Port: 3128
-
Protocol: HTTPS
-
Check Authentication
-
Enter anything for Username: and Password:
(e.g. Username: "abc"; Password: "123")
-

- Click the Update button to save options and close the current window. You will be returned to the Login window.
- Login normally.
![]()