Configuring Mozilla Thunderbird
![]() to access mail.ateneo.edu
to access mail.ateneo.edu
Mozilla Thunderbird can be downloaded here.
NOTE: Due to various versions of these programs in use, the steps here may not exactly apply to your version. Please consult the help system of your specific program for further guidance.
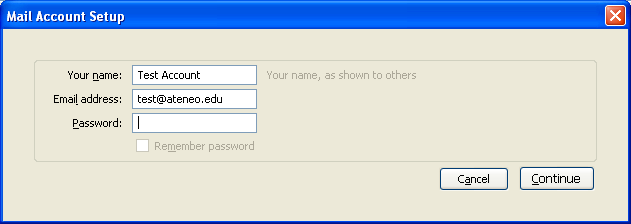
- Start Thunderbird. If it has just been installed and you are using it for the first time, the
Mail Account Setup dialog will open.
- If you already have an existing installation of Thunderbird:
- To add a new mail account, open the same dialog in Step 1 above by clicking on File on Thunderbird's top menu bar then selecting New then Mail Account. Continue to the Step 3 next.
- To edit an existing mail account, open the Account Settings window by clicking on Tools on Thunderbird's top menu bar then selecting Account Settings. Jump to Step 7 below.
- Enter your information that is requested then click on Continue.
- Thuderbird will then try to automatically detect and set the correct mail server parameters. If these
are the same as in the figure below, click on Create Account and Thunderbird is ready to go.
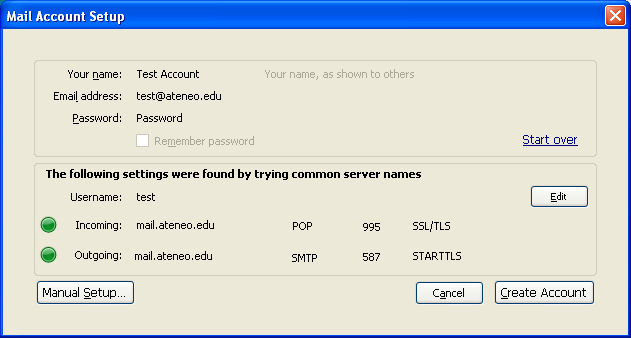
- If Thunderbird was not able to set the correct parameters, click on Manual Setup.
- The Account Settings window will open. Expand the entry for your newly created account
from the left panel, then select Server Settings.
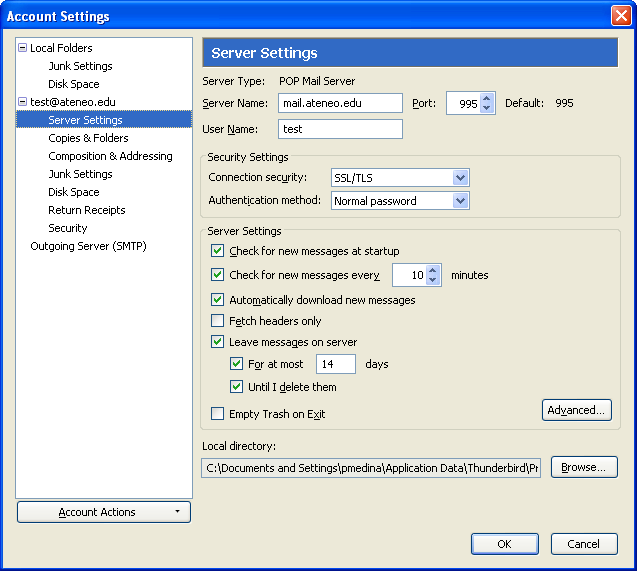
- Verify and correct if necessary the information in the first five fields in the Server Settings
dialog:
- Server Name = mail.ateneo.edu
- Port = 995
- User Name = your assigned user name
- Connection security = SSL/TLS
- Authentication method = Normal password
- Configure the other parameters in the Server Settings section according to preference but if you check Leave messages on server, it is recommended you at least check Until I delete them.
- Go back to the left panel then select Outgoing Server (SMTP). The right panel will change to
the Outgoing Server (SMTP) Settings dialog.
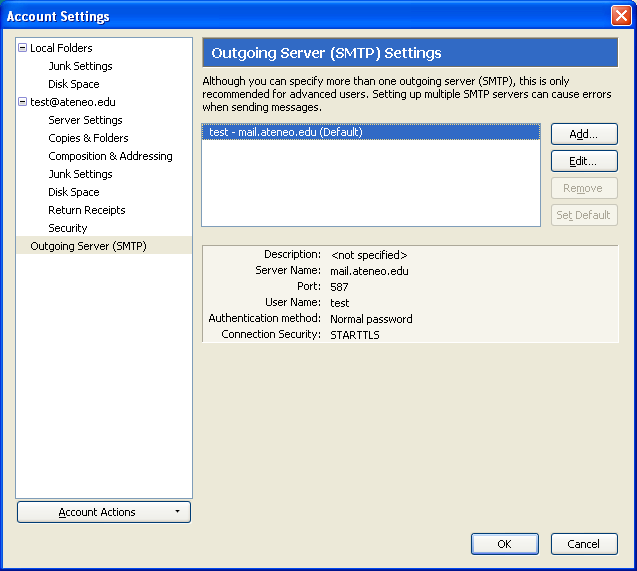
- If AdMU email will be your default use for Thunderbird, select the server marked (Default) in the right panel then click Edit. If you already have another default SMTP server configured, click on Add instead.
- The SMTP Server dialog window will open.
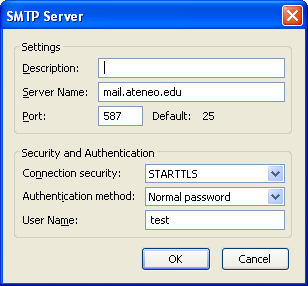
Input, or verify and correct if necessary the following fields:- Server Name = mail.ateneo.edu
- Port = 587
- Connection security = STARTTLS
- Authentication method = Normal password
- User Name = your assigned user name
- Click OK to close the SMTP Server dialog window.
- Go back to the left panel then select actual entry of your account. The right panel will change to the Account Settings dialog.
- Make sure your Email Address is correct, and select the Outgoing Server (SMTP) you just configured for mail.ateneo.edu.
- Configure the other parameters in the Account Settings dialog according to preference.
- Finally, click OK on the bottom right of the configuration dialog window to save your settings and close the window. Thunderbird is now ready to go.
![]()